
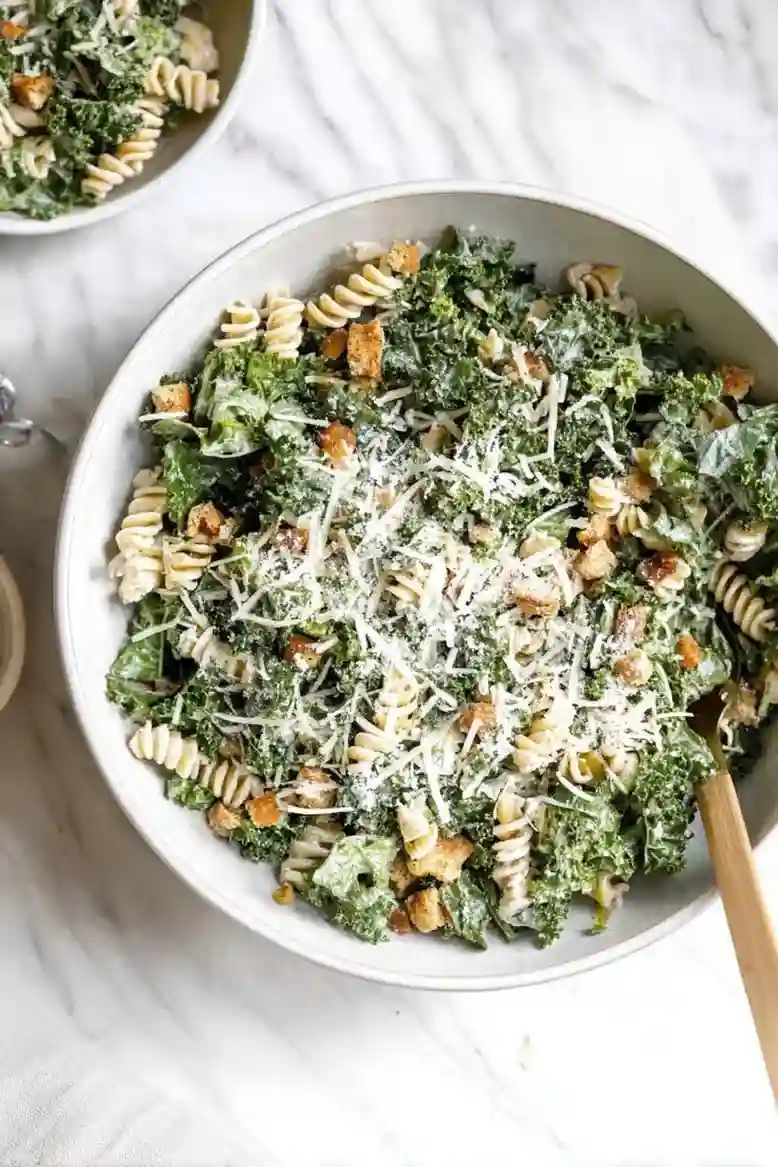
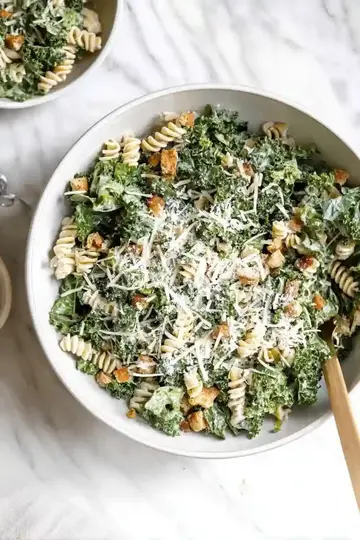
This Kale Caesar Pasta Salad is a fun twist on two favorites! You get the creaminess of a Caesar salad mixed with the heartiness of pasta. Perfect for a light meal or an easy side dish.
This recipe addresses issues with chickpea crispness, salad dressing thickness, and prevents leftover pasta from drying out.
I love this recipe because it helps me get more greens on my plate without feeling like I’m just eating a salad. And with my family’s gluten allergies, I’ve always got to find ways to keep everyone satisfied with tasty options.
The combination of massaged kale and crispy chickpeas not only makes this salad healthier but it also gives it a great texture. It only takes about 50 minutes from start to finish, which makes it doable even on busy days.
Why You Will Love This Recipe
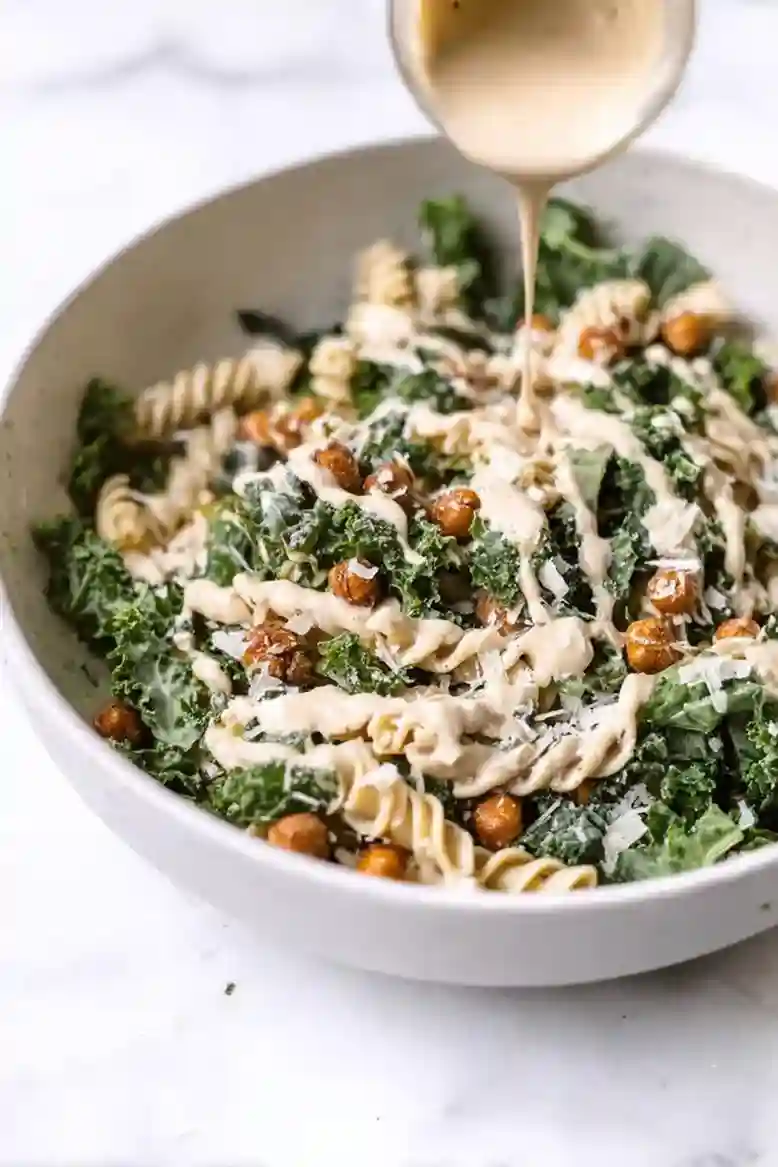
- Crispy Texture , The baked chickpeas add a satisfying crunch that contrasts beautifully with the tender pasta and massaged kale, giving each bite a delightful texture.
- Flavorful Profile , With its creamy, tangy dressing and savory notes, this salad delivers a delicious combination of flavors that’ll keep your taste buds happy.
- Quick Preparation , You can whip this up in no time, making it a hassle-free option for meal prep or a quick weeknight dinner.
- Easy Storage , This salad stays fresh for days in the fridge, especially if you store the dressing separately, making it a great option for lunches throughout the week.
Ingredient Notes
- Gluten-free pasta: This gives the salad its base and keeps everything together. Slightly undercook it for the best texture later!
- Kale: Fresh kale adds crunch and nutrition. Make sure it’s chopped well and de-stemmed; you don’t want any tough bits!
- Chickpeas: They bring protein and a nice bite to the salad. Canned ones are super easy, just rinse them well before adding!
- Mayonnaise: It creates that creamy dressing we all love. If you’re not a mayo fan, Greek yogurt works like a charm instead!
- Plain Greek yogurt: This adds a tangy twist to the dressing while keeping it creamy. Feel free to swap it out for mayo if you prefer!
Keep scrolling to the recipe card below for the full printable recipe!
Recipe Tips
- If chickpeas aren’t getting crispy, make sure they are completely dried and spread evenly on the baking sheet before roasting.
- For pasta that hardens after refrigeration, consider cooking it an extra minute to maintain tenderness when stored.
- If the dressing feels too thick, mix in a little water or extra yogurt until it reaches your desired consistency.
- When making the dressing, using a blender can save time, but a whisk or fork will work just fine for blending.
- If you’re using gluten-free pasta, undercook it slightly to help retain its texture after chilling in the fridge.
Serving Suggestions
- Serve this kale caesar pasta salad alongside grilled chicken or fish for a hearty meal. Pair it with corn on the cob to enjoy a summer feast.
- This salad works well in meal prep or as a quick lunch option during busy days. You can also include it in potlucks or picnics for gatherings.
- You could top the salad with crispy chickpeas for added texture. A drizzle of lemon juice complements the flavors for a refreshing finish.
Storage Guidelines
- To keep your kale caesar pasta salad fresh, follow these storage tips:
- Refrigeration: Store in an airtight container in the refrigerator for up to 3 days to maintain freshness and texture.
- Dressing Separation: For longer freshness, store the dressing separately in a sealed container in the refrigerator for up to 1 week.
- Freezing: For extended storage, transfer the salad to a freezer bag and freeze for up to 3 months. Thaw in the refrigerator overnight.
Recipe Variations
- You can use lacinato kale instead of the regular kale for a milder taste and reduced massaging time.
- Add 1 tablespoon of lemon zest for an extra burst of citrus flavor in your pasta salad.
- Either replace chickpeas with grilled chicken for more protein, or incorporate crispy bacon for a savory twist.
- If you’re scaling the recipe, use 12 ounces of pasta and proportionally increase kale to 7.5 cups and chickpeas to 2 cans.
Did you make this recipe? Scroll down to leave a star rating and review!
Kale Caesar Pasta Salad
Equipment
- Large pot
- Baking sheet
- Large salad bowl
- Whisk
Ingredients
- 8 ounces gluten free pasta (227 grams)
- 5 cups de-stemmed and chopped kale (150 grams)
- ¼ cup grated parmesan (25 grams)
- 1 can chickpeas (15 ounces)
- 1 tablespoon olive oil (15 ml)
- ½ teaspoon paprika
- ½ teaspoon garlic powder
- ½ teaspoon onion powder
- ¼ teaspoon salt
- ¼ cup mayonnaise (60 ml)
- ¼ cup plain Greek yogurt (60 grams)
- 3 tablespoons grated parmesan (25 grams)
- 1 tablespoon lemon juice (15 ml)
- 1 clove garlic minced
- 1 ½ teaspoons dijon mustard
- ½ teaspoon salt
- ¼ teaspoon black pepper
Instructions
- Start by cooking the gluten-free pasta until it is just tender. You will know it is ready when it looks slightly undercooked, which helps keep it soft later on. Remember, overcooking can make it mushy, so keep an eye on it.
- Spread the chickpeas on a baking sheet, drizzling them with olive oil, paprika, garlic powder, onion powder, and salt. Roast until they are crispy and golden, filling your kitchen with a savory aroma. Make sure they are well-dried before baking; otherwise, they will not crisp up right.
- In a bowl, whisk together mayonnaise, Greek yogurt, lemon juice, minced garlic, Dijon mustard, salt, and black pepper. You will want a smooth consistency that is tangy and creamy. If it feels too thick, just add a splash of water or extra yogurt to loosen it up.
- Combine the chopped kale and pasta in a large mixing bowl. Gently fold in the crispy chickpeas and the dressing, ensuring everything gets coated in that tasty mix. Look for a vibrant color and texture; it is all about the combination!
- Sprinkle grated parmesan over the salad and give it one last gentle mix. This little touch adds a lovely salty finish that ties everything together. Just be careful not to add too much at once; you do not want it to overpower the dish!
- Let the salad sit in the fridge for a while before serving. This helps all those flavors meld together beautifully. If you skip this step, it might taste a bit disjointed, so give it a little time to chill!
Leave a Reply