
I’m excited to share this manicotti pasta recipe with you today! Making manicotti from scratch might sound tricky, but it’s actually not as hard as it seems. This recipe is adapted from my family’s cherished traditions, and it will surely bring a smile to your face.
This recipe solves issues of heavy filling by using light ricotta, preserving family traditions, and providing an easy method for homemade pasta shells.

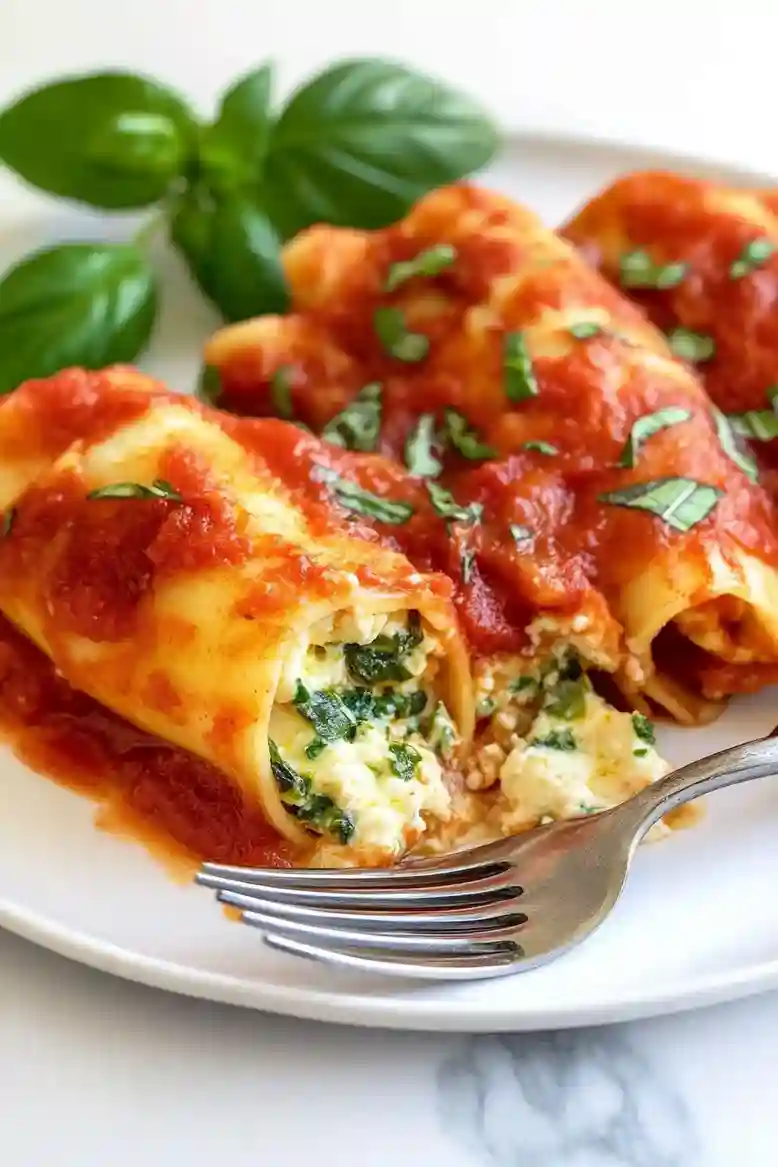
Sometimes, I struggle with recipes that turn out too heavy or dense, especially with pasta dishes. My aim was to create a lighter option by using part-skim ricotta for the filling. It’s a great way to make a classic recipe feel fresh and enjoyable for everyone, including my family members with gluten allergies.
What’s great about this recipe is that it uses homemade manicotti shells, giving it an authentic taste. You can whip this up in about 2 hours and 30 minutes, with just 30 minutes of cooking time. It’s a simple method to learn a family favorite that’s perfect for any special occasion.
Why You Will Love This Recipe
- Light and Creamy Filling , Unlike many restaurant versions, this manicotti uses a lighter ricotta filling, making it a comforting dish without being too heavy.
- Homemade Pasta Shells , You’ll get to make authentic homemade manicotti shells that add a personal touch and taste that store-bought just can’t match.
- Quick Prep Time , With minimal prep, you can whip this up in a short afternoon, making it a hassle-free option for special meals.
- Easy Storage , If you’re making it ahead, just store the filled manicotti in the fridge. It’s ready to go whenever you are for a hassle-free dinner.
Ingredient Notes
- Eggs: You’ll need a bunch of eggs to create those lovely manicotti shells. Grab large eggs, and they should be at room temperature for the best results.
- All Purpose Flour: This is the backbone of your manicotti dough. Go for a good quality flour; it’ll help give your pasta the right texture. No need for fancy types here!
- Water: Just plain water works wonders in combining the flour and eggs into a smooth dough. Filtered or tap will totally do the job, just make sure it’s not too hot.
- Part Skim Ricotta: This creamy cheese is key for stuffing those pasta shells, you want that cheesy goodness! Make sure it’s fresh; it seriously makes a difference.
- Marinara Sauce: Grab a jar or make it from scratch, either way, this adds tons of flavor. If you’re short on time, store-bought works perfectly well too!
Keep scrolling to the recipe card below for the full printable recipe!
Recipe Tips
- If you want to make shells in advance, prepare them one day ahead and refrigerate on parchment-lined baking sheets.
- When cooking the shells, make sure your pan is fully heated and generously apply non-stick spray to prevent tearing.
- For a fluffier filling, a splash of milk or water can lighten the consistency if it ends up too dense.
- If your manicotti seems mushy, try reducing the baking time and keep an eye on the sauce for bubbling.
- When crafting your homemade shells, an 8-inch non-stick pan yields uniform sizes for an even cooking experience.
Serving Suggestions
- Serve the homemade manicotti with a fresh salad on the side. Garlic bread complements the dish well and adds substance.
- Consider using leftover manicotti in pasta bakes or casseroles. This dish works well in lunch meal prep for easy reheating.
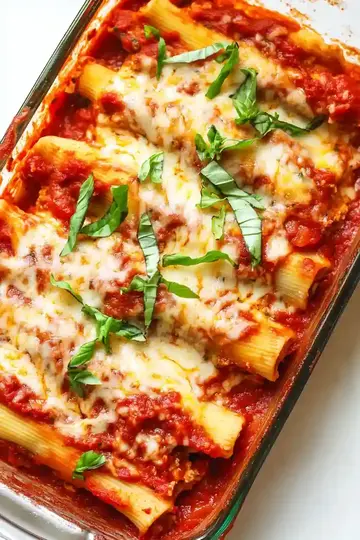
- Add fresh basil on top for a refreshing touch. A drizzle of olive oil can also enhance the overall presentation.
Storage Guidelines
- To keep your homemade manicotti fresh, follow these storage tips:
- Refrigeration: Store filled manicotti in an airtight container in the refrigerator for up to 1 day. Cover with parchment paper.
- Freezing: Wrap uncooked manicotti in plastic wrap, then place in a freezer bag. Freeze for up to 2 months. Thaw in the refrigerator overnight.
- Reheating: Reheat manicotti in an oven-safe dish covered with aluminum foil at 350°F for 20 minutes or until hot.
Recipe Variations
- You can use whole wheat flour instead of all-purpose flour for a healthier choice.
- Add 1 teaspoon of garlic powder or 2 teaspoons of Italian seasoning to the Marinara Sauce for extra depth.
- Either substitute half of the ricotta with mascarpone for creaminess or use cottage cheese for a lighter filling.
- For a smaller batch, use 4 eggs, 1 3/4 cups of flour, and 1 1/2 cups of water. Adjust other ingredients accordingly.
Did you make this recipe? Scroll down to leave a star rating and review!
Authentic Homemade Manicotti
Equipment
- Large Bowl
- Non Stick Pan (8-inch recommended)
- Parchment Paper
- Baking dish
- Large Ladle
Ingredients
- 8 Eggs (approximate 480g)
- 3 ½ Cups All Purpose Flour (400g)
- 3 Cups Water (720ml)
- 1 Teaspoon Salt
- Non Stick Cooking Spray
- 3 Eggs (approximate 180g)
- 1 Large (32 oz) Container Part Skim Ricotta (approximate 907g)
- 1 Small (16 oz) Container Mozzarella (approximate 454g)
- 1 Small (8 oz) Container Mozzarella (approximate 227g)
- 3 Tablespoons Grated Parmesan Cheese (approximate 24g)
- ½ Cup Milk or Water (120ml)
- ¼ Cup Finely Chopped Flat Leaf Parsley (15g)
- 6 Cups Marinara Sauce (1440ml)
- ¼ Cup Grated Parmesan Cheese (24g)
Instructions
- Start by whisking 8 eggs in a large bowl until they are nice and frothy, which should take about 1 minute. Next, add 3 cups of water and 1 teaspoon of salt to help achieve a smoother consistency. Be gentle to avoid overmixing; you want a light batter, not a dense one!
- Gradually stir in 3 1/2 cups of flour, combining until there are no dry bits left. The batter should feel thick yet pourable. Let it sit for 10-15 minutes; this helps the flour hydrate fully, which is crucial for making beautiful shells.
- Coat an 8-inch non-stick pan with cooking spray, ensuring even coverage, and preheat it over medium heat. Pour some batter into the pan, swirling it for an even layer. Look for the edges to lift slightly; that is your cue to flip! Allow them to cook no longer than 30 seconds per side to avoid rubbery shells.
- In another bowl, mix together 1 large container of ricotta, 1 small container of mozzarella, 3 eggs, and 3 tablespoons of parmesan until everything is well blended and creamy. If it feels thick, add a splash of milk or water to lighten it up. Taste a bit to ensure it has the right flavor and consistency.
- Grab the cooled pasta shells and stuff each one with the cheesy filling using a large ladle. Place them carefully in a baking dish. Avoid over-stuffing as it can cause them to burst while baking.
- Pour 6 cups of marinara sauce over the filled shells, ensuring they are nicely covered. Sprinkle with 1/4 cup of grated parmesan on top for an added layer of flavor.
- Pop your baking dish in the oven and bake at 375 degrees F until bubbly and golden, approximately 20-30 minutes. The aroma will fill your kitchen. To prevent sogginess, ensure you do not overbake.
- Once baked, let the manicotti sit for about 10 minutes before serving. This helps everything set up nicely, making it easier to slice without the filling oozing out.
Leave a Reply